Find this post and other gardening/DIY tips on my Gardening Pinterest board
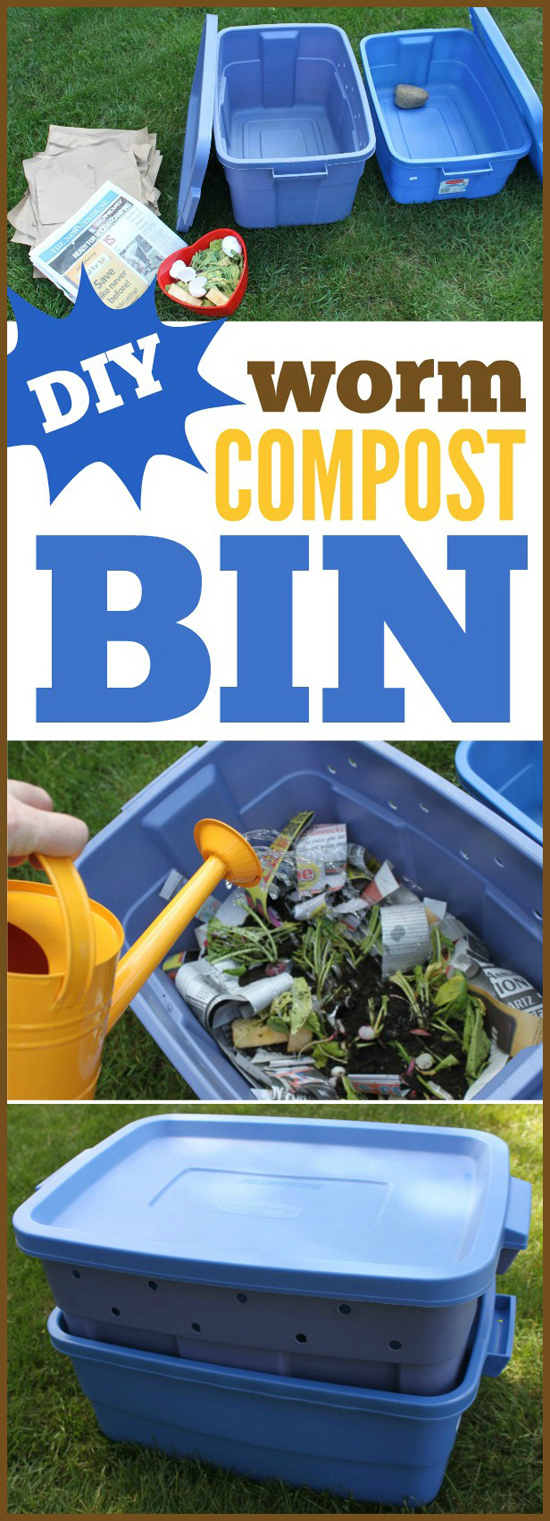
DIY Worm Compost Bin
I shared this post originally in May 2012 – but it’s one my most popular posts and I wanted to bring it back for those of you who haven’t seen it.
Worms creep me out. Sorry, it’s true. But I do have a four-year-old boy, so for better or worse, they have become a part of my reality as of late. I can’t touch them or even look at them too closely without getting the heebie-jeebies. But nobody can deny it – worms are good for eating food. Worms are good for composting! Worms are just generally helpful fellas – so I’m making a worm composting bin – and I’m going to show you how!
Believe it or not, my husband and I used to have a worm bin back when we were first married – it was a wedding gift from one of my bridesmaids (I have the coolest friends!). But for whatever reason that worm bin, made out of a rubbermaid tote, only lasted us a couple years before it turned into storage for our halloween decorations. 🙂 So we’re bringing it back and I’m going to show you how to make a Rubbermaid Worm Composting Bin!
What’s so great about worm composting? Worm composting is a fabulous way to take your family’s food waste and turn it into nutrient rich fertilizer for your garden or lawn. If you have a lot of space you could skip this whole worm composting thing and just create a big ole compost pile in your backyard. But compost piles aren’t for everyone – especially if you’re short on space. A worm compost bin can be a great way to take care of your food waste – but do it in a contained, mess-free, smell-free, easy-to-maintain system – that in-turn gives you rich soil amendments for your garden or yard.
 Mouse over image, top right to PIN this
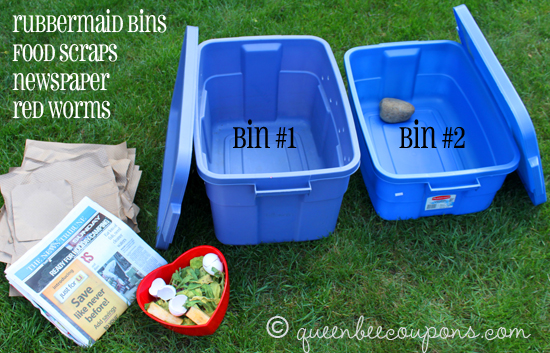
YOU’LL NEED:
- Red worms – about one pound
- Two (2) 8-10 gallon Rubbermaid totes
- Power Drill
- A couple good size rocks or wood pieces for spacing
- Newspaper and cardboard
INSTRUCTIONS
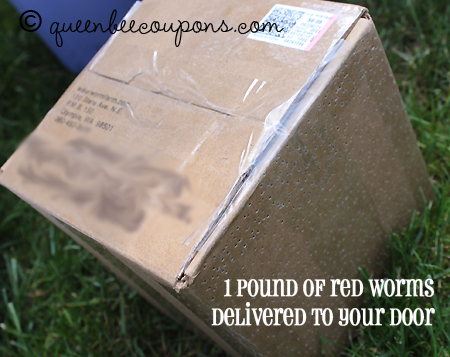
1.) Get your worms, preferably Red Worms
I asked on the Queen Bee Facebook page – and all my Facebook friends recommended I order my worms from the Olympia Worm Guy – Wiser Worm Farm. Being local – this option made great sense to me and I promptly ordered one pound of Red Worms for $27. They came in the mail less than 24 hours later (don’t you love the the Worm Wide Web?) You might be thinking I could have easily went digging in my backyard – but I want Red Worms, not your typical earthworm. From what I read earthworms will eventually die if added to a compost bin. And besides, since I’m a little squeamish I’d rather just pay $27 and have a box of worms arrive on my front porch. So that’s what I did. Besides, you get about 500 Red Worms per pound – so I figure that’s only $0.05 cents each! What a deal, ha! 🙂
I also discovered Amazon carries worms, did you know this? Seriously is there anything they don’t sell?
- Red Wiggler Composting Worms 2lb Pack
– $29.95 (price subject to change) – plus about $10 shipping
- Uncle Jim’s Worm Farm 1,000 Count Red Wiggler Live Composting Worms
– $24.95 + $4.95 shipping
You might be able to worm your way out of out of paying them – and I welcome you to share those ideas in the comment section below! Either way – the end result is – you need worms. Preferably a hungry batch of Red Worms.
2.) Get your bins
As with most things you can buy a fancy composting bin from Amazon or you can make your own using a couple $5 Rubbermaid tote. I ended up using bins I already had in my garage! You want two (2) dark plastic (not see through) Rubbermaid totes that are between eight to 10 gallons. I’ll call these bin #1 and bin #2.
Bin #1 is going to hold the worms and compost. Bin #2 is basically just a drainage bin, for when the bin gets too wet. I don’t think it’s even entirely necessarily to have a second bin – as long as you watch the moisture level.
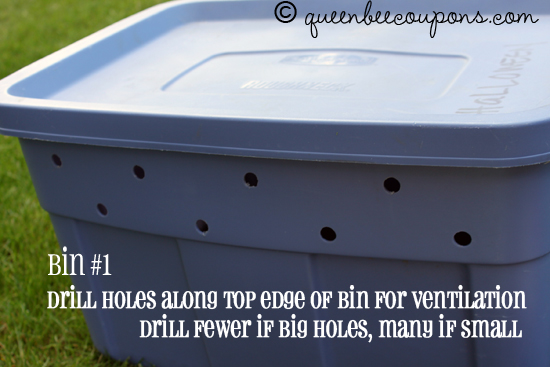
3.) Drill holes in sides of Bin #1
Along the top edge of Bin #1 you’re going to want to drill holes. These will be above your compost line and will allow for ventilation – essential to the happiness of your worms. I’m using the bin that was given to us many years ago – and it happens to have large holes. If you don’t have a large drill bit, you can drill many, many smaller holes. Another option I’ve seen is you can cut out a portion of the top lid and replace with mesh screen – not a bad idea, but I’d worry about rainwater leaking and this is a bit more time intensive.
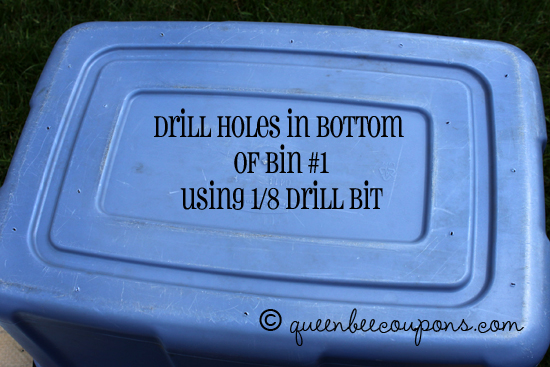
4.) Drill holes in bottom of Bin #1
Using a 1/8 drill bit (small) you will drill holes in the bottom of your worm bin. Preferably drill them in the recessed or lowest parts of the bottom of the bin – because that’s where water would sit and ultimately drain. Don’t worry – you’re worms won’t try to climb out of these holes – as long as they have a happy environment with plenty of food, they don’t try to venture out.
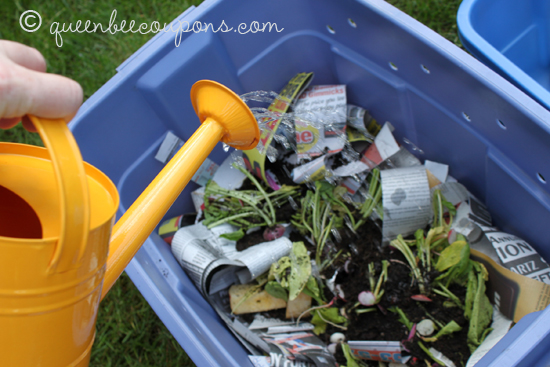
5.) One your bin has holes, shred up some newspapers (not your coupons!) and add it to the bin. Then add some dirt (for grit, helps with digestion), add your food scraps, sprinkle with water. You don’t want it too wet – and a good way to know is if you squeeze your “bedding” and if it drips, it’s too wet.
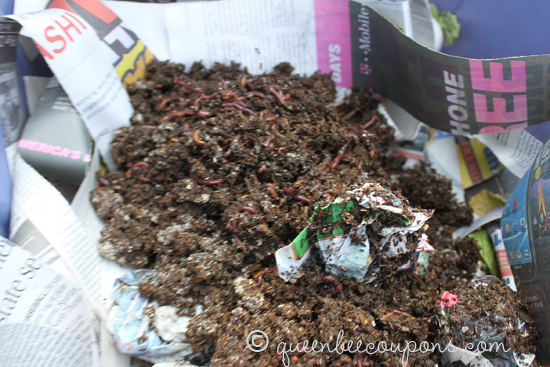
6.) Add your worms. My worms came with an ample supply of dirt and newspaper – so I dumped it all in. Then I gave them a little bit of water to freshen them up. Not too much!
7.) Cover with another layer of newspaper and a wet piece of cardboard. This does two things – it keeps any fruit flies away and it keeps your worms happy because they love both wet cardboard and darkness.
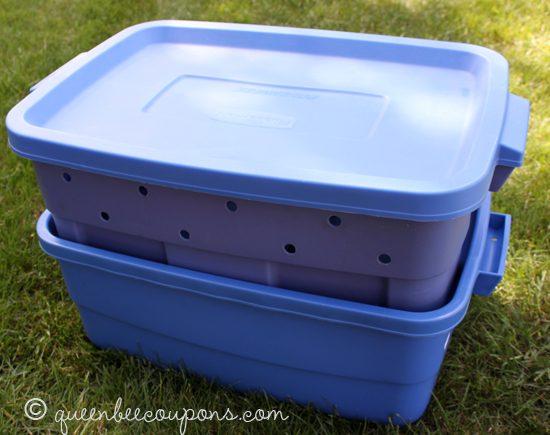
8.) Place Bin #1 inside Bin #2 – Bin #2 is going to have a couple rocks in it, the same size – to hold bin #1 up a bit above the other – to keep your ventilation holes free flowing. You could also use pieces of wood or gravel – anything to elevate your worm bin (Bin #1) inside your drainage bin (Bin #2). I actually used a bigger Bin #1 – this helps as well.
9.) Placement – Keep bin in a relatively cool place. No colder than 35 degrees and no hotter than 80 degrees. This means in the heat of summer you should move it to the cool garage. Also, don’t put near vibrations, like a washer or dryer, worms don’t like shaking. If you have it outside, make sure it won’t fill with rain water – you’ll drown your poor worms. A garage, shed or covered patio would be perfect! Many people keep them in their homes – you don’t have to worry, as long as the worms are happy they won’t escape!
10.) Maintain! Add food waste as you have it. You are in business! Now just add food to your bin as it’s available. Keep an eye on your food levels and if it’s getting a little high – take a few days off. But red worms can eat their weight in food a day – so if you have a pound of worms, you can compost about a pound of food a day!
As far as harvesting your nutrient rich worm poop/compost – I’d say give it at least a couple months – then you can dump the bin out onto a tarp and harvest your good soil. It’s very concentrated stuff, so a little bit goes a long way – mix with water to make worm poop tea and use as a soil amendment!
FEEDING YOUR WORMS
- Worms love: Breads or other grains, coffee grounds and the filter, tea bags, fruits, vegetables, egg shells (they love these!)
- Worms do not like: Dairy (this means cheeses, milks, yogurt), fatty foods, meats, oils
That’s it! It really is that easy. As long as your worms are fed, they have plenty of ventilation and things are kept moist – you really can’t go wrong. Good luck!
TROUBLESHOOTING
If you set it up right it shouldn’t smell, the worms shouldn’t try to escape, you shouldn’t have fruit flies and it should require very little maintenance. If you are having some of these problems – here’s what you need to likely fix:
- Worms are trying to escape or they are dying – your bin is probably too wet, too dry or needs more bedding. If you squeeze the bedding and it “drips” it’s probably too wet.
- Smelly bin – Too much food, your bin needs more ventilation or your bin is too wet. You can stop adding food for a couple weeks so the worms can catch up. Drill additional holes for ventilation. Replace very wet bedding with just “damp” bedding.
- Fruit flies – Not enough bedding. Keep your food covered with a layer of shredded newspaper at all times.
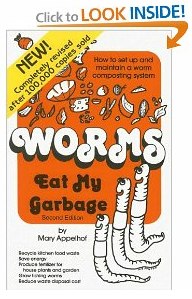
This is a fantastic resource to getting your worm bin set up – Worms Eat My Garbage: How to Set Up and Maintain a Worm Composting System (Amazon)
And of course, the best resource of all on worms – a 4-year-old boy.
He’s awfully proud of his “tutorial” so check it out!
If you don’t see the video – you can view it here: 4-year-old give worm bin tutorial
Like this post? PIN it!
*Like Queen Bee Coupons on Facebook for future updates!
* Subscribe to my daily email and be entered to win $100!
My disclaimer: I’m not a worm compost expert, although I have done a ton of research and I really did create this worm composting bin for our home use, but I’m not really the worm expert.
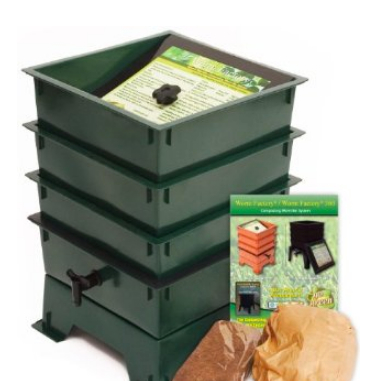
If you prefer to buy one ready to go, Amazon has this Worm Factory DS3GT 3-Tray Worm Composter, Green and a bunch of other designs. You can get a complete set up for about $60-$100, and some much fancier than that.
I’d love to hear from you – do you have a worm compost bin? Do you think you’ll start one? Do you have questions about worm composting?



I also know from experience. I had a garden on rented property and got horse manure from a nearby farm. The fresh manure had tons of red worms in it. The farmer said they lived inside the horses intestines. i didn’t get a chance to harvest the worms and when i told the farmer about what my plans were he then put a high price tag on the horse manure even though the first time i got the manure he begged me to take it. I didn’t want to pay his high price for worms and never started my worm composting project.
I took seminar on worm composting many years ago. I was disappointed in that they didn’t offer worms at least for sale. they gave resources somebody could go to to buy worms for a high price. I was impressed with a worm composting system that sat underneath the sink but later dismissed the idea as being smelly and then the fruit fly population became epidemic so dismissed that idea. I also learned that they do wind up smelling no matter how good you are at maintaining the worm bin.
I may want to put the worm bin on my back porch. As long as i continue to rent the place i am at i will have that option. It is an enclosed back porch and stays relatively warm during the winter. The temps in this region get below freezing for about 3 months or so. During January we may get a day or two below zero but not for long. I can use an electric heater or even an electric heating coil but then using that electricity defeats the purpose of self sufficiency. The temps have stayed in the high 80s and low 90s for the past three summers. i have an idea how i can protect the worms from the summer heat short of moving north. when i do i may take the worms with me.
I think i may give it a try since it may produce plenty of potting soil at the beginning of the growing season and create fertilizer there after season.
Doesn’t the bin need to stay at a moderate temperature year round? Do you bring your bin inside during hot/cold periods?
a worm bin is cool, but a 4 year old and a worm bin is tops!
your son is adorable! good to see all the stuff he knows about worms, keep it up! 🙂
How do you make sure you don’t accidentally take too many worms out when you harvest the dirt?
Hi!
I was thinking of starting a worm farm and I have a rabbit so was wondering if I could put her poop, hay and newspaper in there?
Thanks 🙂
Em – Not sure on that one! I would call a local garden/farming coop and ask that question.
Okay, Thankyou!
Hi Emma,
Rabbit poo is great compost and even better worm food! It’s ideal for worm food, especially since it’s the only manure that’s low enough in nitrogen that your worms can eat it “fresh.”
Hi… Loved your blog on worm composting. I’m planning to make my bin this weekend. I wanted to know if the bedding can only be newspaper? We don’t get the newspaper, but we have a shredder full of junk mail we’ve shredded. Can I use that for the bedding? Thanks!
Thank you for the blog and the pictures to go with your information…also, I loved the video! What a smart little boy, good job! 🙂
Hello…how do you not lose worms when you pour the mixture on a tarp to separate ? Seems like the worms would be all mixed in with the compost/poop mixture.
Thanks,
Connie
Some might be in the composted material (earthworm castings). so be sure to do it outside in case they escape. THose worms will just go straight into your garden! You can also easily pick them out and rejoin them with your brood by hand.
One thing I was thinking about doing was creating a tiered system with additional bigs. If one were to drill small holes on the bottom of an additional bin, set it up just like bin one, and then place it on top of bin one right as it’s reaching max capacity, the worm *should* begin to migrate to this added bin. Just make sure they have bedding and food waiting for them. This way all that’s left in bin one is a big pile of earthworm castings, and the wiggly little buggers will be busy chowing down in their brand new bin!
Thank you. Going to make one with kids this weekend.
Have to add, I am sorry, but I laughed so hard at the change in your voice when he pulled the worm out!!! Can tell you are creeped out.
Honestly though. Thank you, was a great tutorial.
Omg he is sooooo cute! He should totally have his own YouTube channel!!!!
I`ve been composting for more than 10 years and done it several ways, as I am in a caribean place but, 3.500 feet above sea level, had to adjust to a different climate. What I`ve done this time is in a half a metal barrel I divided it with a mesh, in one half I put the worms dirt and food (I cut food in small peaces for faster decomposting ) cover with black plastic, turn them often, then when the one side is full I stop putting more food in it, but begin put it in the other side with new soil, cover and mixt it often, soon the worms begin to get to the other side leaving the first one to harvest. Don`t know what kind of worms I have but I tell you, have lots of them and I begun with about 10, now I`ve hundreds.
I like the idea but when you dump bin #1 don’t the worms dump out too? How do you deal with that?
This is so helpful! Worms freak me out too, but seems like such a great idea. How do you get the “good dirt” out and leave worms in?
Super excited to try this out. I have some containers and think I can get some free worms from a friend who already composts. YES!!
Your Son is Adorable!
I did have a question, you mentioned dumping out everything to use the compost the worms have created. Is there an easier way to access the compost? ( as like you I don’t wish to handle the worms!)
Thanks for your info!!!
Cindy
That kid is amazing 🙂
My city has a really GREAT guide to go with your worm bin! http://www.greencalgary.org/images/uploads/Vermicomposting_GC.pdf
I also have my own home-made bin. I shred my newspaper in a shredder. You actually don’t NEED the second catch bin – Mine is just one bin with holes in it, so the worms can breathe. But drainage is better, of course 🙂
Many thanks for the web page and the terrific video! I learned a lot, and have set up a mini version of your worm bin with reclaimed, well washed materials (I’m starting with only a small amount of worms given to me by a friend from her bin). I’m almost as excited as your son to continue with my worms, and only hope I can explain them to others as well as he did. 😉
Thanks for the great video! I wanted to let you know that we are starting a worm bin today and I’ll be using it this Sunday to show the kids at Sunday School about worms and starting their own worm bin at home. We just renovated an old unused area at our church and made it into a children’s garden area, with a play area, a digging bed, and 4 raised beds where we are growing tomatoes, carrots, bush beans, etc. We’ll have a courtyard area too for the older folks to come and relax and enjoy our garden.
Hi!
Thank you so much for this detailed and unintimidating tutorial! Would you tell me how you “harvest” the compost- how often, how do you get it out without taking out the worms, and what you do with it? I mean, do you just sprinkle it on your garden, or would you use it in place of potting soil, etc.?
Thank you!
Hey! I know this post is old but it is helpful! How do you harvest the compost without getting the little wrigglers in with it?
I know this post is old, but I just got back from the NW Flower & Garden Show up in Seattle and was inspired to find a way to make my own worm farm because my budget cannot handle $80+ for a preassembled one. While I was doing research, I’ve found out that red worms also aren’t very much a fan of onions or citrus fruits due to the acidity and could potentially stop eating. Thought you maybe would like to add that tidbit of info if you ever decide to do an update on this post.
By the way, I love your instructions and I’m so excited to create this tomorrow 🙂
Love this! I was looking at the models on Amazon as well, but wanted to try making one first because it’s cheaper. Great article! Thanks for posting it.
Thank you for a VERY HELPFUL website! I just finished building my composter! Your little guy is adorable!!!
Little Cutie and Mom!
I am researching worm bins and came across your video! SQUEEEE!
What a clever and charismatic little guy!
I will have my worm bin up and running next weekend!
Thanks for the lesson!!
You can get 1,000 red worms for $26 at Uncle Jim’s Worm Farm (shipping included).
http://unclejimswormfarm.com/index.php/Live-Worms/1000-Red-Wigglers/flypage.tpl.html
I learned so much from your son! He needs his own talk show or reality show =) Well, the coop I bought from your link arrived already. I’ve picked up my adorable chicks. My raised beds hopefully will be done by next week. Now, I can’t wait to start my own vegetable garden with my nutritous compost. BTW, I just bought this vegetable starter kit which I think is great for a first time grower like me. I hope you don’t mind if I share this link. Thanks so much for inspiring me!
http://www.livingsocial.com/deals/627478-start-your-own-vegetable-garden?rui=95487437
HA! Your son is so cute! At the end it sounds like he says “Go get your womans”! He sounds like my almost 5 year old!
Great tutorial! Just a couple of quick pointers from the peanut gallery:
You can get red worms for a couple of bucks wherever bait is sold. Bait vendors generally sell red worms, as they’re the easiest to breed.
Also, you should avoid those coupons. Any paper with a glossy surface and/or color inks should be avoided.
As far as putting red worms in your garden, it really depends on the garden. If they can’t find any uncomposted organic material, they’ll just leave or die. There are other worms better suited for putting in your garden.
Wouldn’t you be able to harvest some of your worms and use them in your garden? Don’t they reproduce and the worms are good for your soil in the garden?
Loved this tutorial, you are so funny. Sounds so easy, I may even do it.
Shame my internet is soooo slow I was unable to watch the video, by the comments it sounds like I missed a great tutorial! My bin is ready and my worms should be arriving Wednesday.
He is SO cute! I love his tutorial!
We currently have a quite large compost bin in our yard and while we do have a few worms,I’ve never really considered having an exclusive “worm composter”~ until now!
The video sold me and I think I’m going to have to order some worms first thing in the morning! 🙂
Thank you for sharing all your knowledge.
I could just feel the excitement coming out! Great job on the video.
He did a fantastic job! Smart kid! My grandson is 21 months. Maybe next summer we will build one of these together. They are in an urban condo but have started getting into the urban gardening. It could easily be left in their parking garage. I was going to do the typical compost pile but may do this instead. I like how it is self contained. I also have many of these rubbermaid bins so all I need is the worms. Thanks for this tutorial video!
What a great video! While I was watching it my 3 year old and 4 year old came in to watch. They now want their own “pet” worms!
That’s what I read online. But of course I didn’t count them. You should read some of the reviews for Amazon’s words. One guy was like, “I ordered 6,000 worms and I counted every one and I only got 3,500. . . ” or some crazy thing like that. Can you imagine counting that many worms? Crazy sauce, I tell you.
Heather – that video was just too stinkin’ cute! He knows so much about worms! I’m inspired!
can’t wait to get started on this, got my bins last night, plenty of newspapers lying around and and gonna start saving those coffee grinds from work Thanks for sharing your cutie with us
Thank you, thank you! I’ve been wanting to compost for awhile now, but space and my creeped out husband was holding me back. Thank you for proving those two thing wrong. 🙂 We are making this this weekend I already have tubs in the garage and hopefully we can find worms at the farmers market tomorrow (I saw them there last year). Thanks again!
Great tutorial. I was hoping to get a tumbling composter but I’m not sure it’s in the budget this year. But I might be able to swing this. Plus my 2 1/2 year old would love the worms!
Thank you for teaching me about worms. I didnt know what worms like to eat until I watched your video. I dont have worms because I live in an apartment but if I ever get a house I will get some worms so I hope that I see your great video from time to time. Thank you so very much. You mom and dad must be so proud of you.
LOVE the video tutorial – your son did such a great job & was so animated! Love how kids describe things! And great tutorial on building a worm bin – might have to try it ourselves, although I will stay far away from the worms! 🙂
Thanks, Jen! It really is an easy thing to set up and once it’s up and running it requires very little maintenance (thank goodness because I’m not into the worms!).
Oh my goodness. The best part was the video!!! But you already knew that. What a cutie pie. Both of your little ones are so darn cute. Going to pin!
Thanks, Karinna!
America’s funniest home video’s! You need to send it, then with that money you coupon alot. That was great. Cute little guy.
Thanks, Judy! He cracks me up on a daily basis.
Oh my. That may just be the cutest thing I’ve ever seen!
Thanks, Kerri 😉
So Cute!!
Thanks, Melissa!
Oh Heather, that has to be the cutest worm video EVER!!! It was so much fun to watch. He is just too cute for words. Makes me wish my kids were that little again.
Thanks, Christy! It is a fun age. . .but I suppose every season has things to cherish!
You obviously don’t have teenagers yet. : )
Ha!
Teenagers are just as fun just a bit more complicated!! 🙂
Sweet video……reminds me of my boys (now 34, 30, & 26 years old). I miss the days when they were young and we did projects similar to yours.