
One way to save on bread and baked goods is to make them from scratch. I am not a baker. I’m not an expert. But I can bake one thing well, thanks to my Grandma. I’m going to share with you my Grandma Ramona’s roll recipe. She’s been baking these (and I’ve been eating them) for as long as I can remember. A staple at big family dinners, they are always a big hit.
I’m warning you – you can’t eat just one. I called my Grandma and asked her if I could post this recipe on the blog. She said sure. I warned her that Oprah might call her (because I know you check my blog daily, right Oprah!?) and I told Grandma that she could soon be famous once word gets out about her rolls. She just chuckled and said she had to get back to her card game with the ladies.
Disclaimer – I am so not a Martha Stewart. I will try my best to explain this recipe to you but I don’t even know all the proper lingo. 🙂 I think this might even be the first recipe I’ve ever posted on the blog – so there you go, good luck!
GRANDMA RAMONA’S ROLL RECIPE
Ingredients
- 2 eggs and water to equal 1 1/2 cup
- 1/2 cup butter
- 1 1/2 teaspoons salt
- 1/4 cup sugar
- 4 cups flour (my Grandma prefers Gold Medal, I use whatever is on sale)
- 1/4 cup powdered milk
- 2 teaspoons rounded yeast
Directions
- Add two eggs to a big measuring cup, add warm water until the level reaches 1 1/2 cups. Pour into bread machine.
- Add butter (I warm mine first), salt, sugar, flour and powdered milk to bread machine – in that order
- Make a well in the top of your ingredients and add your yeast
- Turn the bread machine on dough setting (this just makes the dough, it doesn’t bake it)
- My bread machine takes two hours. After dough is done, take it out of bread machine and set it on counter, cover and let rise for 30 minutes
- I spray olive oil instead my Pampered Chef stoneware pan (but you can use any pan, just butter or grease it first)
- Break the dough into small pieces and form them into balls. Make them smaller than you’d think – they will grow in the oven
- If you want, you can brush melted butter on top of your rolls, we don’t do this and they still turn out just fine
- Have your oven preheated to 350 degrees F. Put rolls in for 28 – 30 minutes. This could vary by oven or pan type – so just watch them closely after 25 minutes.
- Remove and cool. Enjoy.
Don’t have a bread machine? You could easily knead this by hand. How to do that, I don’t really know, I recommend consulting Google. 🙂 My grandma uses a bread machine, so that’s the way I do it. This is also the same dough recipe that my grandma uses for her amazing cinnamon rolls – that’s another post for another day.
Time saver tip – I actually measure out the dry ingredients ahead of time and put them in big gallon Ziploc bags. This way, I don’t have to haul out all the ingredients every time we want rolls. All I have to do is add my eggs and butter, dump in my bag of dry ingredients, throw in the yeast and push start on the bread machine. Big time saver and it makes it easy for my son to help out because he just dumps the bag in the bread machine and ta da – he’s made rolls. 🙂
For those of you that are visual learners, here you go:
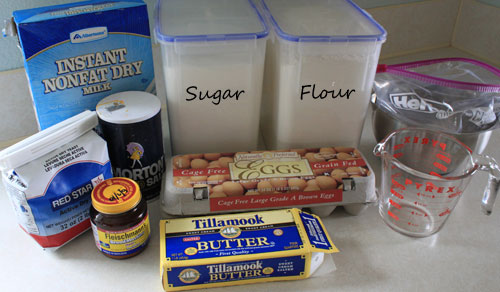
Get your ingredients out.
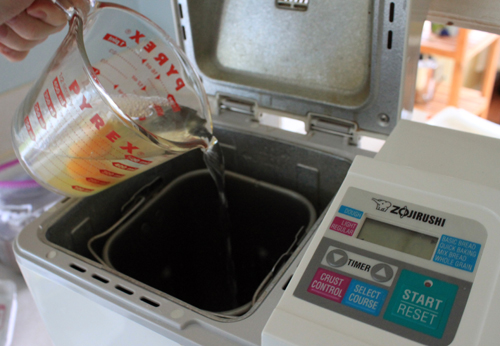
Add the wet stuff first
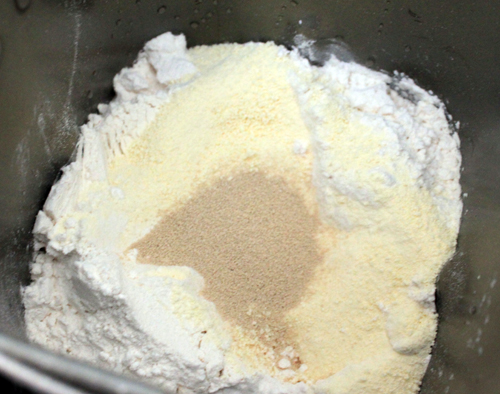
Add dry ingredients and your yeast
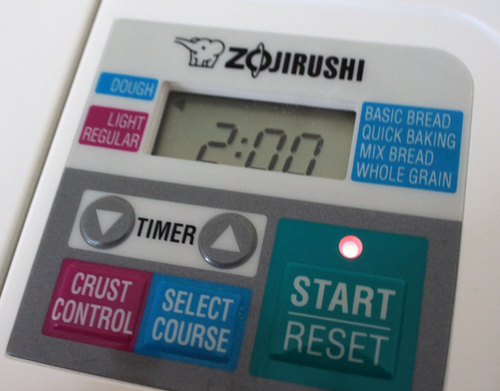
Use the DOUGH setting on your bread machine. Don’t try and bake this recipe in your machine – it’s too much quantity, it will overflow and burn (I’m speaking from experience). You can find bread machines for sure cheap at thrift stores or watch Amazon for bread machine deals. We were blessed to have my husband’s grandparents give us this one because they weren’t using it anymore.
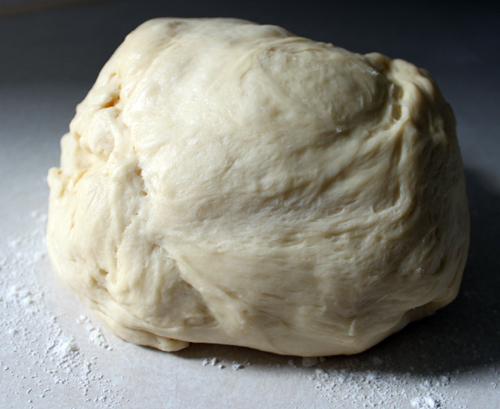
Here’s what it should look like when you take it out of the bread machine
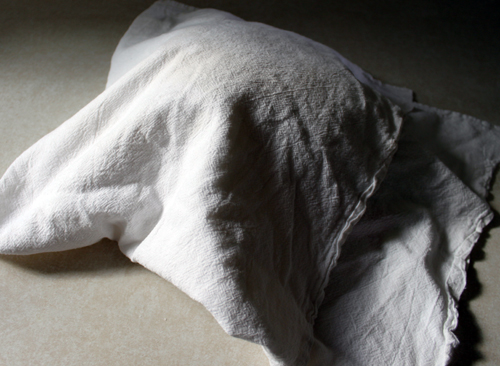
Cover it for 30 minutes so it can rise to the occasion. While it’s rising, grease your pan and preheat your oven to 350 degrees F.
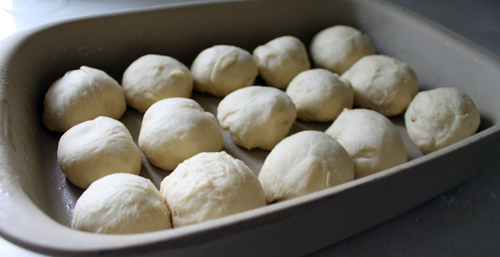
Roll out the dough balls. Make them smaller than you’d expect. I generally push up through the bottom and tuck the ugly edges underneath, so it has a smoother top. But I’m a long way from making them look as pretty as my grandmas. AND even at their ugliest, they are still divine. Bake in the oven for 28-30 minutes at 350 degrees on until golden brown. . .

Ta Da! I just turn the whole pan upside down and dump them out to cool.
To save time on making these again (I hope you’ll want to!) I recommend measuring out all the dry ingredients and putting them in a ziploc bag. This can be stored in your pantry and ready to go when you want to make some rolls! I write on the bag what ingredients I still need to add, so I don’t even need to dig out the recipe.
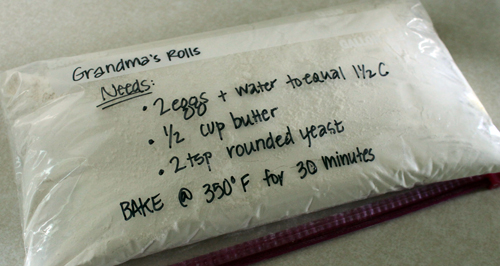
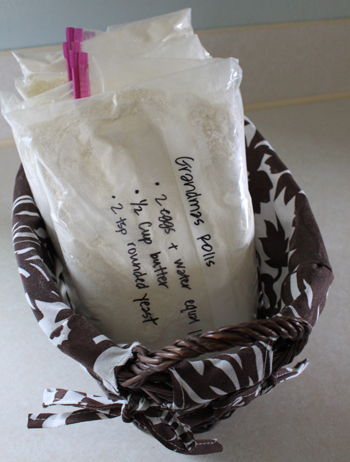
Make up four or five batches at once and just store them in the pantry! You can also reuse the bags for next time.
I hope you enjoy this recipe. It really is near and dear to me! My kids LOVE these and it warms my heart to know he’s enjoying the same goodness that I grew up with.
Do you have a favorite family recipe that you adore? How do you save time and money baking?



Don’t you have to do a second rise on these after shaping and before baking?
I used fresh milk – but had to add more flour to counteract all of the wet. I don’t have a bread machine so that could also be a part of it. What I ended with was more like KFC’s biscuits. Good and even better with honey but not all of the kid’s cup of tea.
I had a lot of dough left so I made pretzels with it. I gave up on the pretzel shape after awhile. I have no skills. I made pretzel sticks. Everyone pounced on those and they now think I am a rockstar.
How big is the pan you’re using for the rolls and about how big are the balls when you first roll them? They look fabulous and I’d love to give them a try!
LOVE that you are sharing such a special recipe. Thank you so much for this. I will definitely have to try it.
O.MY.WORD! I made these tonight for my family, and everyone could not get enough of them. SO GOOD! Thanks for sharing the recipe! It’s definitely a keeper!!
Love it! I’m so glad you like them. Thank you for sharing. 🙂 I hope they become a staple at your place!
Most definitely! I’ve already got three bags premade, as you suggested, and am currently making my second batch to take to the in-laws for dinner tomorrow. Plus, I shared the post with ALL my facebook friends :o) Love it!
What is “rounded yeast” I’m new to yeast recipes! Is that a rounded teaspon of yeast or is “rounded yeast” a particular product? Thanks!
Sorry – I should update the wording. It’s a rounded teaspoon of yeast – so fill ‘er up!
And you definitely can’t eat just one. I ate too many!
They turned out great for me last night. I substituted the powdered milk for 1/4 c of fresh milk instead of water. I probably could have added more.
Thanks! I’ve been looking for a good roll recipe. I just bought a bread machine so that I could save money making bread from scratch rather than buying rolls and biscuits and pizza dough!
Sounds yummy. And I love the idea of putting the dry ingredients in the bags. Looks like it makes a little over a dozen. Are they about 3″ when they are done? Or bigger? I’m just thinking if I made them for sliders it might be pretty good.
Mary – They would be perfect for sliders, they are about three inches. We have used them for sandwiches, just make the rolls a little bigger!
CHEAPEST place for yeast is at Costco. Stick it in the fridge (in a baggy or tupperware) and it will last ages. If you have a Kitchen aid, knead it with the dough hook, this goes for a Cuisinart as well! 🙂
Hey Celia,
Thanks for the tips! I buy my yeast at Costco, freeze the big bag and and then use a small container in the fridge that I just move the yeast to. It’s worked out great. Thanks for the tip on the dough hook and Cuisinart!
I get mine at winco in bulk.I also use it straight from my freezer to the bowl been doing that for years 🙂
I’m curious if you’ve ever made a loaf instead of rolls with this??? I think we’d use a loaf more, so I’d like to know if it simply won’t work before I take the time and use the ingredients… Either way, thanks for sharing!!! Recipes from grandparents are the yummiest 🙂
YES! It can be made into a loaf. I don’t know the cooking times for this. You’ll have to do some googling. 🙂
Hey Heather, Thanks for the picture. I am a visual learner and I really appreciate you.
Great idea to prepack the dry ingredients. I should do this with my other breads I make. I have only done it with my brownie recipe.
Those look yummy! I’m going to have to try to make them today. 🙂 Do you know what your bread machine does for the 2 hours? Is it just mixing, or does it heat them at all? I’m going to try it in my kitchen aid instead so I was just wondering if I’ll need to add heat or anything special.
I believe it does warm it up. It doesn’t even stir for like the first 20-30 minutes. It just warms, I think. So maybe if you are making in your kitchen aid you can let it rise in a warm spot for a little bit? Good luck!
You can use warmer water to help heat it up too, just be careful not too hot or it will cook the eggs.
I make these rolls with a very similar recipe ALL the time. Very easy and also so very tasty!! I spray mine with “I Can’t Believe It’s Not Butter Spray” just before and just after baking when they come out of the oven. Gives them a nice buttery flavor and “glow”